Anyone who’s owned a camper knows that a prime concern is where to store your sewer hose, or as the kids call it the poop pipe. Old school thought says to store it in the 4″ x 4″ hollow steel bumper. This poses several problems… First is the inside of these steel bumpers is usually not well protected, so adding a wet hose to this environment asks for long term rust trouble. The other issue is that the newer 4 tab host connectors, elbows and plastic donut are too big for the bumper.
Our friend Steve Hodapp used an item I borrowed heavily from. He hung a 6″ PVC pipe under his camper with threaded ends. It looks great, keeps the stink hose out from within the camper and won’t rust. My biggest issue was while Steve was able to source his 6″ PVC pipe for free, I couldn’t. I priced the pipe and found it be very expensive.
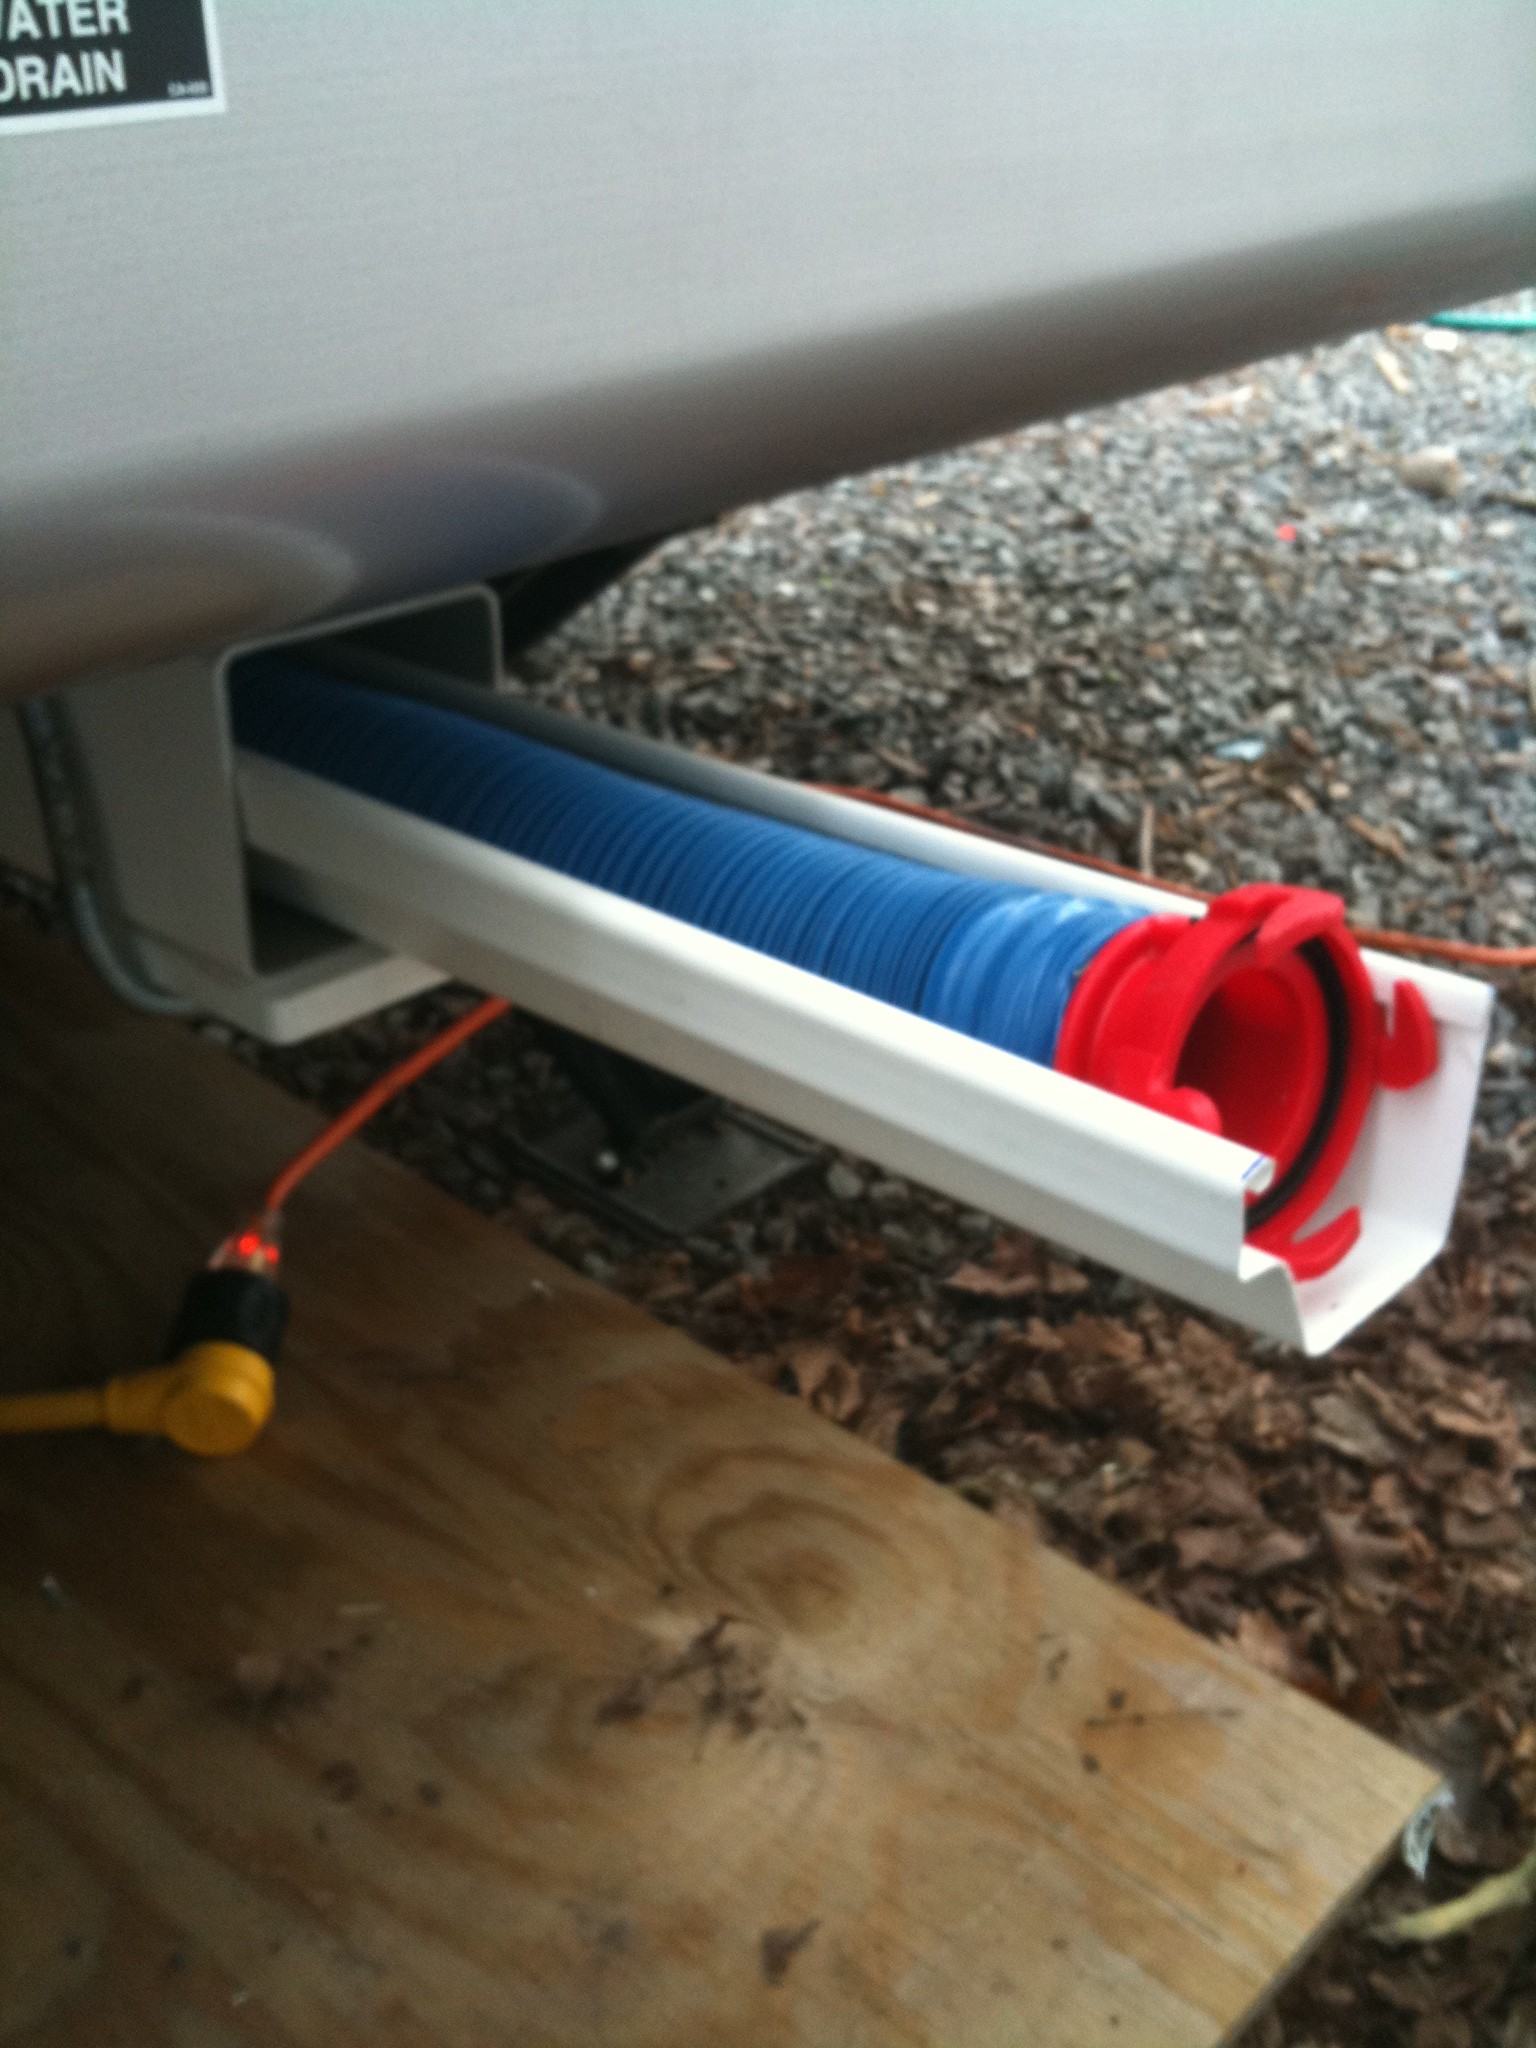
One day while wandering through Home Depot, my mind started to wander. I stumbled upon a 5″ x 5″ thick vinyl post in the oops section. In the back corner of our Home Depot theres a section of custom orders that weren’t right. I scored 8′ of 5″ x 5″ vinyl post for $25. The 6″ PVC pipe would have been almost four times that. I quickly scooped it up and put it in the cart. I had a plan. As I rounded the corner, I spied a 4-1/2″ by 8′ gutter. My mind started turning… a slide out tray for the sewer pipe. Over kill, yes… overkill… absolutely. I could hear Tim Taylor in my head… <hawr> < hawr> < hawr>
I got a great look from the wife when I brought this stuff from the truck to the garage. Now how do I hang this under the camper? Our travel trailer has an enclosed underside, which keeps the important goodies clean, dry and warm, but makes some modifications more difficult. It just so happens that between the sewer outlet and the back of the trailer are the rear stabilizer jacks. These already were bolted to the frame and the bracket that drops below the enclosed underbelly is about 12″ wide. I decided that I could fabricate a bracket from some 1-1/2″ angle stock I have.
I cut the angle iron so it would extend about 9 inches in front of the stabilizers. While I used a plasma cutter to shape it around an errant bold head, a grinder would have worked as well. I drilled holes so that the stabilizer bolts would help hold it as well as an extra hole in the stabilizer bracket. These three bolts are 3/8″ x 1″ bolts… pretty hefty. On the vinyl piece, two 7/16″ inch holes and fab’d a backing plate. All metal parts got a quick coat of black oil based Rustoleum, then bolted back up. The vinyl piece was bolted up with the assistance of a floor jack for a lift assist.
I felt the ends should be removable for cleaning, etc. I cut a pair of end caps that slide into the tube out of 3/4″ plywood. They were sanded smooth and painted with white exterior paint. The back end will be closed with a pair of brackets that will be closed with spring clips. The business end will be secured with a 1/2″ spring run through a handle.
When I hung the tube, I drilled a few hold where the low point would be and used a pair of washers to angle the tube in that direction just slightly.
[postgallery_grid content=”image” lightbox=”yes” slidesetid=”rv-sewer-pipe” undefined id=”0″ imgheight=”200″ /]
Leave a Reply